

Get Empowered: Review Window and the Processing Method | Tip #27
 158
158 
By Neil Lander July 25, 2017
Tip #27: Using System Suitability to Flag Failing Results
In the last tip of the week for using Empower Software, we explored how to perform cross-channel internal standard calibration and quantitation. This tip will address how to use the System Suitability option to flag failing results.
Here we go!
Wouldn’t it be nice if Empower Chromatography Data Software could flag a failing result? Well, it can and it is very easy to set up.
Step 1
Bring raw data (Channels, Injections or Sample Set) into Review and open the processing method. Click the Processing Method tool (Figure 1).
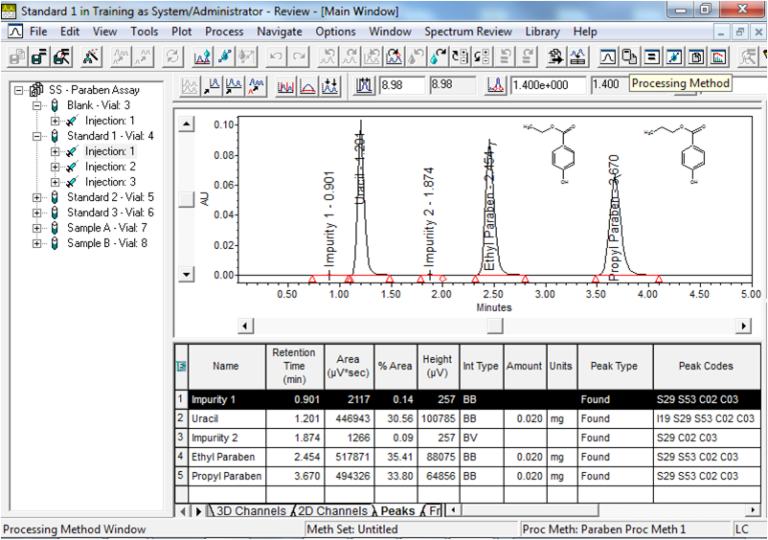
Figure 1
Step 2
Click the Suitability tab and check the box that says Calculate Suitability Results. Enter the Void Volume Time, an estimate is fine (Figure 2).
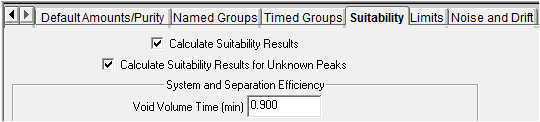
Figure 2
Step 3
Click the Limits tab. In the upper table (Suitability Components), highlight the row number for the component of interest (Figure 3).
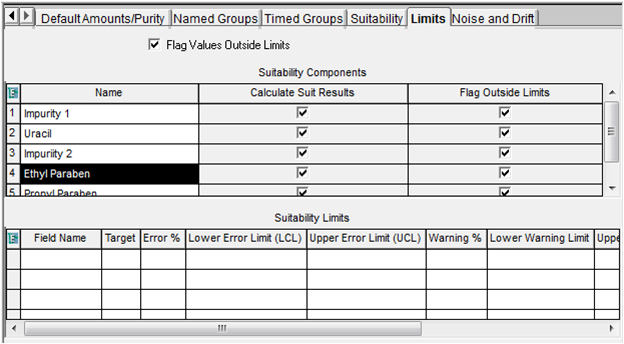
Figure 3
Step 4
In the middle table (Suitability Limits), click inside of the Field Name field and choose the field of interest (Figure 4). This list contains all of the same peak fields you see in the Peaks table below the chromatogram in Review.
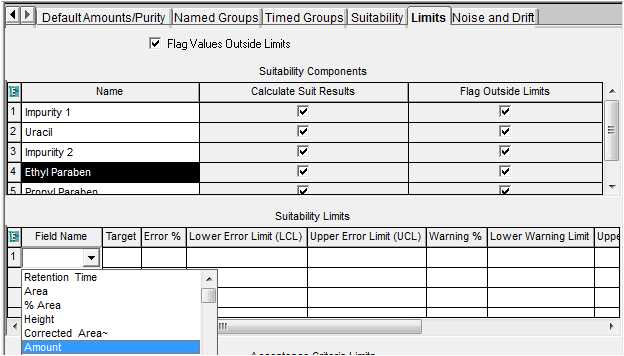
Figure 4
Step 5
You can set a Target Value, however, that is not a requirement (Figure 5).
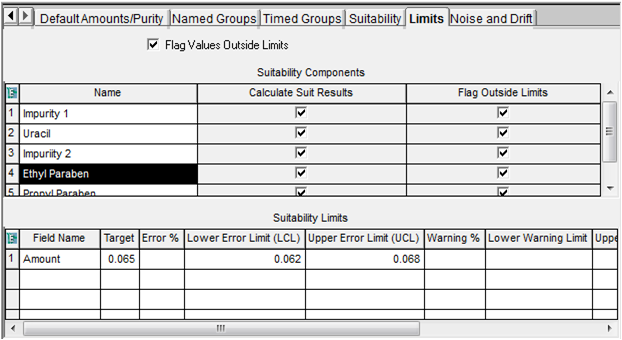
Figure 5
Step 6
Enter a Lower Error Limit and an Upper Error Limit (Figure 6). Depending on the field of interest you may only need one limit. For example, I would only set a lower error limit for USP Plate Count. An upper error limit in this case wouldn’t apply because the higher the plate count, the better the system performance.
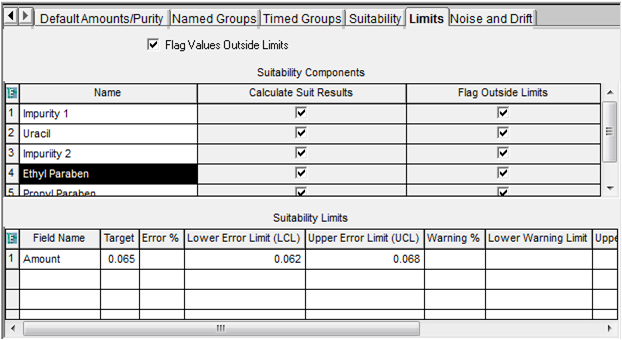
Figure 6
Step 7
Save all changes to the Processing Method and exit from Review (Figure 7).
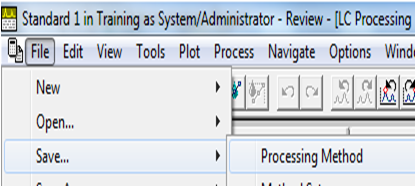
Figure 7
Step 8
Back in project window, click the Sample Sets Tab, right click on the Sample Set of interest and select Process (Figure 8).
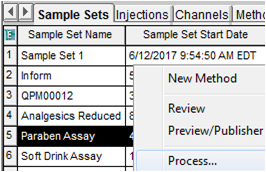
Figure 8
Step 9
Select the Method Set or Processing Method, enter any required comments and click OK (Figure 9).
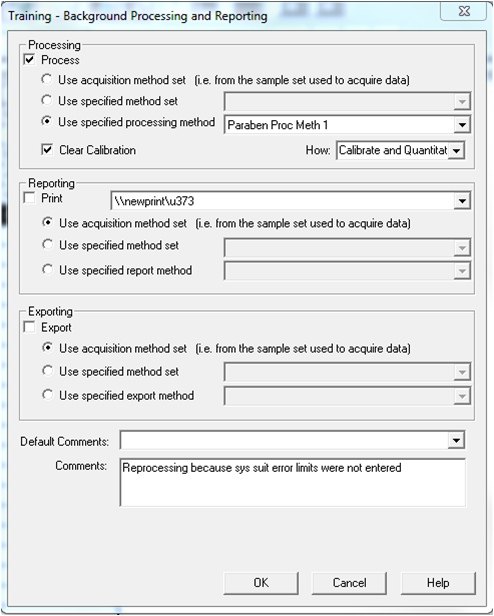
Figure 9
Step 10
Go to the Results tab and observe the Fault field (Figure 10).

Figure 10
Step 11
Go to the Result Sets tab, right click on the Result Set and select Review (Figure 11).
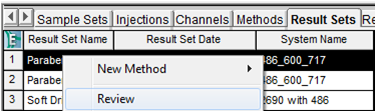
Figure 11
Step 12
As you drill down into the Result Set note any peak names in red, italicized font and then note any other fields in red, italicized font (Figure 12). This draws your attention to which components have issues and what those issues are.
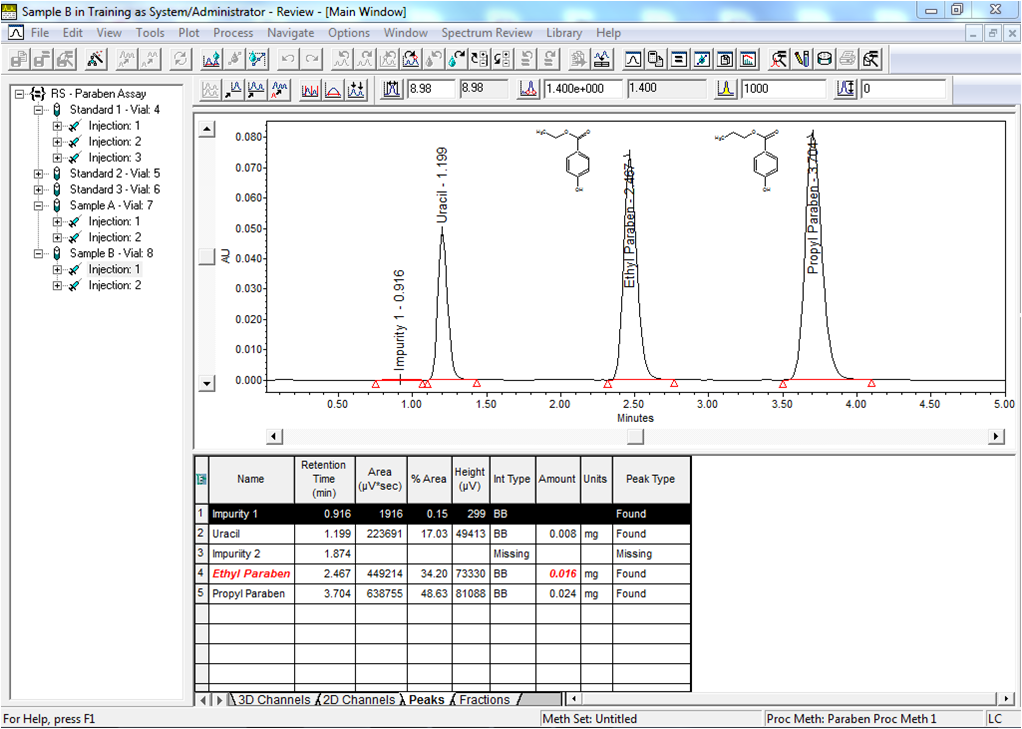
Figure 12
Step 13
Finally, if a limit for a peak field is exceeded, it will trigger Interactive System Suitability, which was covered in Tip #14 – Using Interactive System Suitability (Figure 13).
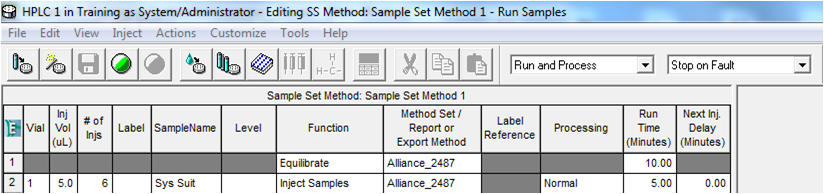
Figure 13
Final notes:
- You must have the System Suitability option and enable it in the project.
- You can set limits on a component by component basis.
- This procedure can be followed for both the QuickStart and Pro Interfaces.
Next week in Empower Tip #28: Calculating Signal to Noise Ratio
More resources:
- Want to learn more? Check out our Empower training courses and eLearning
- See all of our tips for using Empower CDS Software
- Comments? Connect with at #EmpowerTips or @WatersCorp on Twitter.
- Submit an Empower 3 Review with Select Science. Write a review.